Permaculture design is founded on the basis of 12 key design principles (See What is Permaculture for a full list). No matter where you are in life, what resources you have available, and what lifestyle you live, these 12 design principles provide a framework for solving problems, working with nature, and creating spaces that are resilient and adaptive. In this series, I will go through each of the 12 permaculture design principles, explain what they mean, and share some ideas about how they can be applied to someone beginning a permaculture journey while living in a rented apartment. Check in over the coming weeks to learn about each of the principles and gain new ways of thinking about the spaces you create, wherever you might live!
Permaculture Design Basics 7 – Design From Patterns to Details
While learning any new skillset or way of thinking, it is human nature to get excited about and fixate on a particular new technique or detail. After all, for most people it’s far easier to deal with concrete systems and actionable ideas than it is to grapple with big picture, strategic, and abstract concepts. However, when we sit down to create a design as permaculture thinkers, we are challenged to step back and look at how all the individual elements of a system will interact and support one another. Fixating on the nitty-gritty of one particular element to the exclusion of everything else is a luxury we can’t afford if our final design is going to be cohesive.
To help us think in terms of the interfuncitonality of our entire site, there are many patterns and energetic flows that should be mapped out before we place a single element on our site plan. Each one of these patterns provides a lens through which we can view the functionality we hope to create. By creating literal overlays that we can flip between while viewing our site, the placement of different elements becomes a process of discovering where things fit naturally, rather than an attempt to force things where we “think” they should belong. Only after patterns are determined does it become appropriate to really zoom in and flesh out the details. Below, I’ll lay out some of the most common patterns we deal with in permaculture, though I challenge you to think of other patterns that might be appropriate to consider while designing your own spaces.
Common Permaculture Patterns
Geography & Site Maps
Because permaculture revolves around working with the land we occupy, it is natural that one of the first patterns we consider when assessing a site is the geography and layout of the site itself. Often, this takes the form of a site map, which can be an overhead photo of the site taken from Google Earth or a drone. If an overhead photo of the site isn’t available, then a basic sketch of the site, drawn to scale, can work just as well.
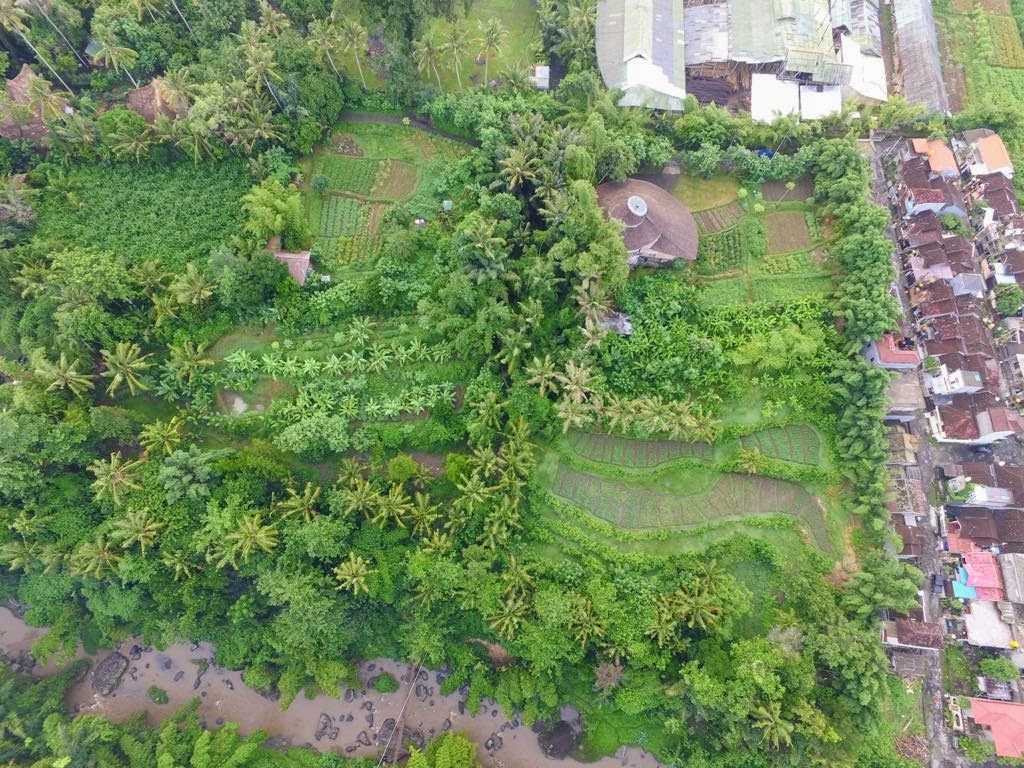
On top of this overhead photo, it is helpful to use simple lines to highlight features such as existing buildings and pathways, changes in elevation, vegetation, and infrastructure such as electricity and running water. Mark the boundaries of the site, though also consider any important features that lay outside of the site itself. For instance, you might not be able to change the position of a nearby public road or a neighbor’s house, but it is still an important element to consider when figuring out where to place pieces of your grand design.
Other important aspects of the geography of a site are the position of the sun, the direction of prevailing winds, the flow of water, any important views (either something beautiful to be highlighted or ugly to be hidden), and any regulations that might limit what you can and can’t build in certain areas. In short, your site map should draw attention to all of the things you can’t change about your site without significant effort, but which nevertheless will play a role in determining how various elements function and interact.
The main purpose of this layer of pattern is to help you understand and visualize the raw features of the site you’re starting with. If we know what already exists on a site, from a patch of trees to a rocky slope, we can find ways to take advantage of these features. Consequently, we avoid the temptation to bulldoze everything before we even consider the benefits of what we already have.

Functionality and Permaculture Zones
What is the primary function of the site you are designing? In other words, where will the most activity on the site take place, and what do you hope to accomplish through this activity? If you’re designing a residence, then there is a good chance that the house will be the main center of activity, and the primary function of the site will be to provide for the needs of the people living there. If you’re designing a commercial farm, then maybe the washing, packing, and storage facilities will be serve as the hub of the design. In a park, you might want to funnel activity towards a central amphitheater or an area where art installations will be displayed. A single site might have multiple important functions (for example a single property with both a home and a commercial chicken farm), and in these cases it might be helpful to consider who will be occupying these different spaces and what they will be trying to accomplish.
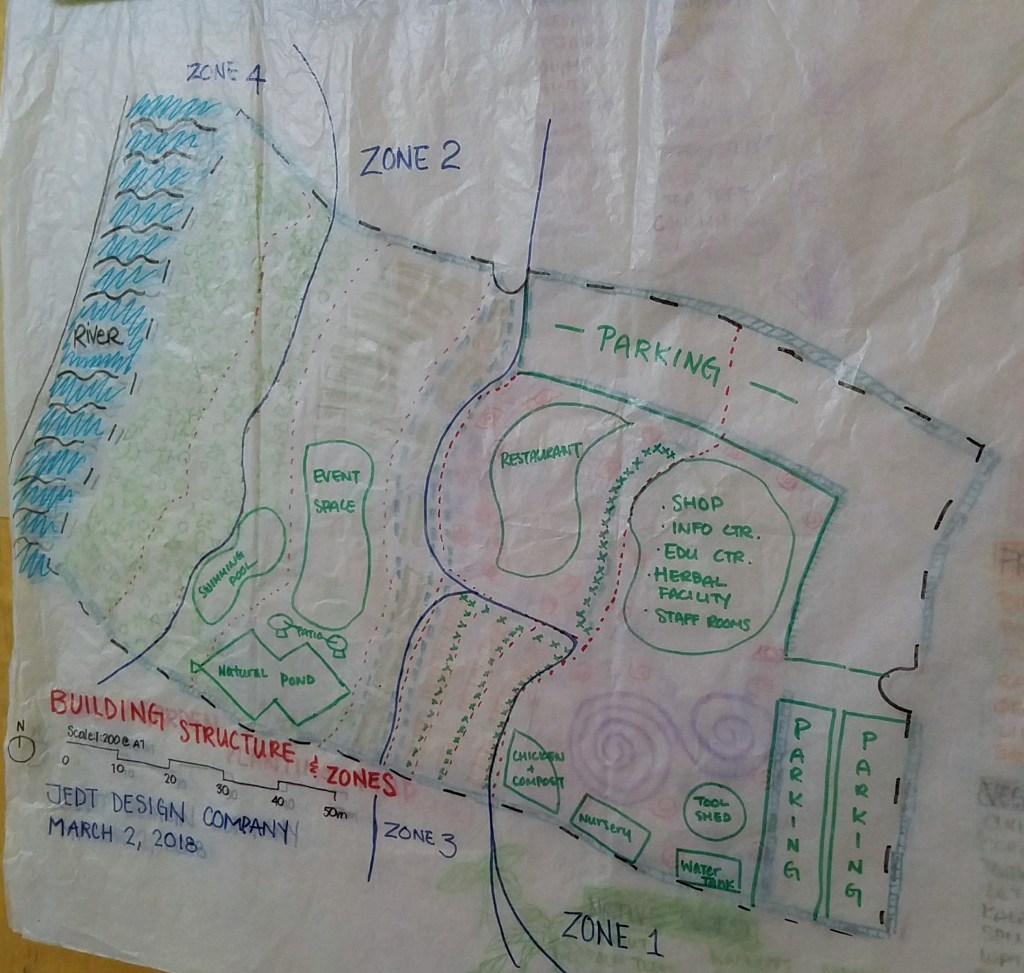
When you know the primary function of your site, you can begin thinking in terms of permaculture “zones.” These zones are a way of conceptualizing how often different areas of the sites will be visited, and they encourage us to be strategic while considering the movement of people and energy throughout a site. For the sake of example, I’ll consider a homestead and outline the various zones and functions they might serve.
Permaculture Zone Basics
Zone 0 is the primary hub of activity. For a residence, Zone 0 is almost certainly the home itself. It is the “default” place that people will be spending their time, and all activity will radiate outwards from this central point.
Zone 1 contains the design elements that will be visited multiple times per day. This might include a small herb garden right near the kitchen where herbs will be plucked frequently during the preparation of meals. It might also include a drop-off point for food waste, dining space, areas for entertaining guests, and shelter for family pets. Generally, Zone 1 will be closest to the primary hub of activity so that time and energy isn’t wasted walking back and forth across a property multiple times every day.
Zone 2 is visited approximately once per day. Here you might find things like tool storage, higher-maintenance livestock such as chickens, flower gardens in need of frequent weeding and cultivation, and annual crops like tomatoes that you want to water and harvest on a regular basis. Your actual compost pile might also fit within this zone. Unsurprisingly, Zone 2 is a bit further away from the house than Zone 1.
Zone 3 is still further away from the primary center of activity, and it includes things like fruit trees and lower-maintenance livestock that might only need to be tended a few times per week. Anything you want to keep an occasional eye on, but which only needs infrequent intervention is a natural fit here.
Zone 4 is usually near the periphery of the site, and it includes things that are only tended seasonally. Trees grown for lumber, field crops like wheat or corn, and pasture for grazing animals can all be found here. Because these elements only require intervention a few times per year, it’s not a big deal if they are a further walk away from the primary center of activity.
Zone 5 is unaltered wilderness. It is land that is intentionally set aside to grow feral, providing habitat for wild plants, fungi, pollinators, and other creatures. Zone 5 might be visited for activities like hunting or foraging, but it is not tended or cultivated in the way that other zones are. In addition to providing a home for the wild organisms that support the health of the rest of the site, Zone 5 is also a place to meditate or pray and to reconnect and learn from the beauty and wisdom of unaltered nature. It is a place for inspiration and reflection.
Not every site is going to contain all 5 zones. For instance, if you’re living in a house in the suburbs with a 1/4 acre backyard, you might not have a Zone 4 or 5 because you simply need to use all of your available space for more active functions. Even on sites with all 5 zones, the zones might not always be perfectly concentric circles. The geography of your site might mean that there’s a really great spot apple trees close to your home, or you might decide to create a “wildlife corridor” and have a strip of Zone 5 come right up to your back porch so that you can watch squirrels and deer playing while you eat dinner. The zones aren’t meant to be completely rigid and impermeable, but by taking the time to think about and organize your site by the required level of activity, you’ll avoid creating a design that looks fantastic on paper but is a pain to actually take care of in real life.
Interactions Between Elements

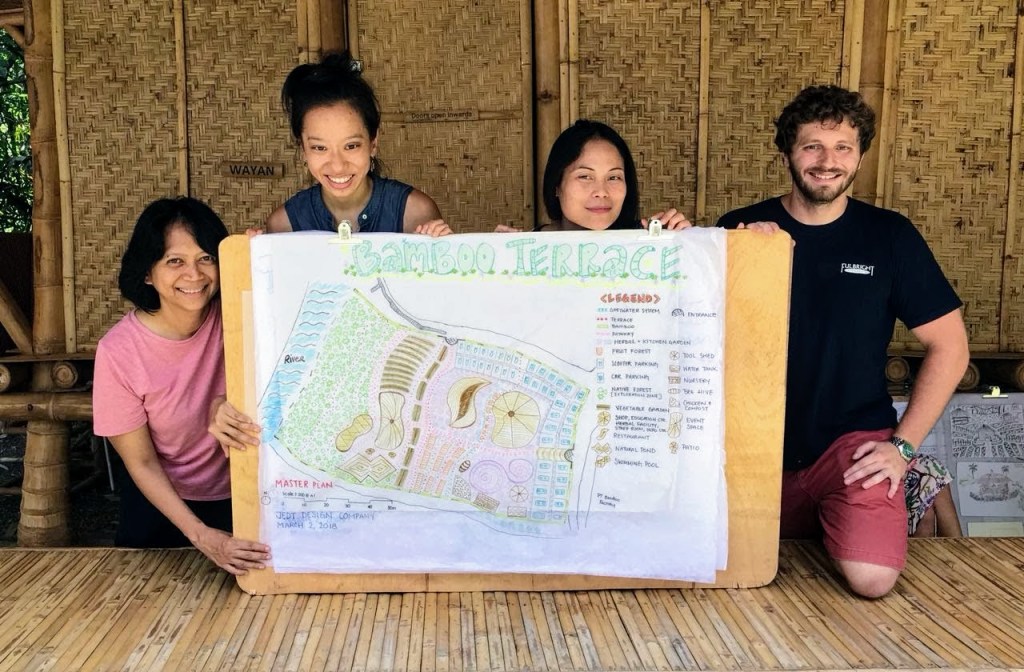
Once you’ve considered the geography of your site and you’ve given some thought to the zones you might want to create, it’s time to begin considering the ways that certain elements might play well with one another. A classic example is to place a chicken run alongside your vegetable garden so that as you go along harvesting your crops, you can toss any weeds or scraps over the fence for the chickens to eat. It’s also a great idea to place your compost pile uphill from your gardens, because it’s much easier to roll a wheelbarrow filled with compost down a hill than it is to push it up.
This stage of design might require a bit of trial and error on paper until you get everything sorted out perfectly. That’s exactly why it should be done on paper before attempting to put it into practice. If you start placing design elements on a map and it doesn’t work out, you just need an eraser or a clean sheet of paper. Experiment around, and see what works best while considering all of the other layers of patterns you’ve mapped out previously. It’s at this point that you’ll be thankful you took the time to consider the big picture before you started trying to figure out the details.

Designing From Patterns In An Apartment
This is one principle of permaculture design that looks pretty similar whether you’re designing a 100-acre farm or a small studio apartment; all that changes is the scale. Even if you don’t have any outdoor space, you can still apply the same principles to the interior of your apartment.
Where do you spend most of your time for each of the functions that you perform in your home? For cooking, it’s probably the stove in the kitchen. If the stove is your Zone 0, create a Zone 1 around it by keeping the elements you grab most frequently (spices, cutting board, knives, compost bowl) within arms reach. Keep the pots that you only need to grab at the start of your cooking a little further away. Store the emergency canned goods in a corner of a pantry that you don’t use frequently. Then also consider how your cooking activities might interact with other functions in your home, such as entertaining. See if you can come up with creative ways to have those systems all work together to create a more seamless living experience with less wasted time and resources.
The process of identifying patterns and using them to consciously incorporate design elements will slowly change the way you think about and perceive the world. Is it going to save or destroy the Amazon rainforest if you’re walking across the kitchen to grab the salt while you’re cooking rather than being mindful about keeping it close at hand? Probably not, but the exercise of creating a better layout for your kitchen helps you to think like a permaculture designer even when you’re not trying. Then, when you’re at work and you notice that nobody recycles because the trash can is always closer at hand than the recycling bin, you might realize that you can work with the existing patterns of the office to make a big impact and reduce waste heading to the landfill. That change in thinking will be more impactful over the course of your life than any single composting technique you might learn.

Photo by Andrew Neel on Pexels.com
Tying It All Together
If you’re like me, you have a natural tendency to get excited about a new idea and want to put it to work, regardless of how it fits into the bigger picture. This eagerness and creativity is great, but so much of the benefit of permaculture design takes place at the higher levels of system interaction that it pays huge dividends if we can take the time to observe and map out patterns before we start trying to focus on details. Understand your setting, define your objectives, and physically map out the flow of people, energy, and resources first, and you’ll find that your designs function just as well in reality as they do on paper. As a permaculture designer, there’s no better feeling.

One thought on “Permaculture Design Basics: Design From Patterns to Details”