
Gardening on a Rental Property
When you live in a suburban apartment complex like I used to, it’s easy to write off the possibility of starting an outdoor garden. After all, I only had about 10 square feet of garden that was “officially” mine in front of my house, and I was one of the lucky ones. Plenty of people living in apartments don’t have any outdoor space at all, so I guess that means the dream of an herb garden will need to wait until you move into a property with a yard, right?
Not so! While it’s fun to dream about the raised beds and chicken runs we might build when we have more space in the future, there are often neglected spaces near where we live that could be “rehabbed” with a couple of hours and some TLC. In this article, I want to show you how I converted a patch of thorny weeds that no one cared about into a “forever home” for my sage, rosemary, thyme, and a few flower bulbs. Learn these skills, and you’ll be able to grow on the neglected edges that abound in suburbia.
Choosing a Site for Your Garden
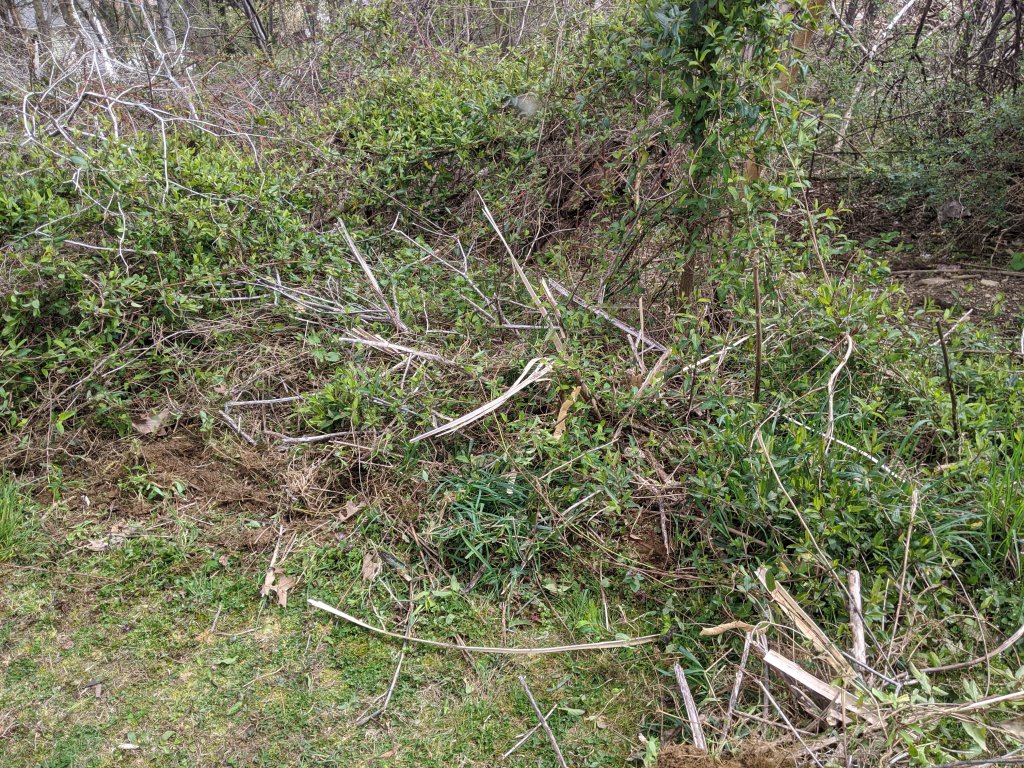
The first step in growing your suburban edge garden is to select a spot in need of some love. The edge of a woodlot or the back corner of a development is often a good place to start looking. Areas with low foot traffic will reduce the likelihood that your garden will be disturbed, especially if you don’t have exclusive rights to the area you’re working on. You’ll also want to keep in mind factors like the amount of sun the site receives, how water will flow across the site, and any animals that might come to visit, as these can all influence the types of plants your garden will easily support. The closer you can keep it to your apartment, the better, as you’ll probably be carrying a watering can to the site several times per week when the weather gets dry. I was lucky to find this patch of weeds just a few yards from my back porch which receives full sun from sunrise until about 2pm in the summer.
Clearing Weeds
The next step is to clear the weeds and vegetation from your site. Depending on what’s growing, this can be done relatively easily with a good pair of work gloves, a shovel, and a rake. There’s no need to totally clear your site; if there’s a sapling or some other stubborn vegetation in the area just leave it. Chances are it will help hold soil and moisture in your garden while your plants get established. The same goes for weeds and shrubs near your garden. The plants you are pulling out of the ground grew there for a reason, and if you’re overzealous in clearing out everything in site, you run the risk of deteriorating the soil that these “weeds” were protecting. Also, don’t throw out the material you clear, as you can use it for either mulch or fill later in the project.


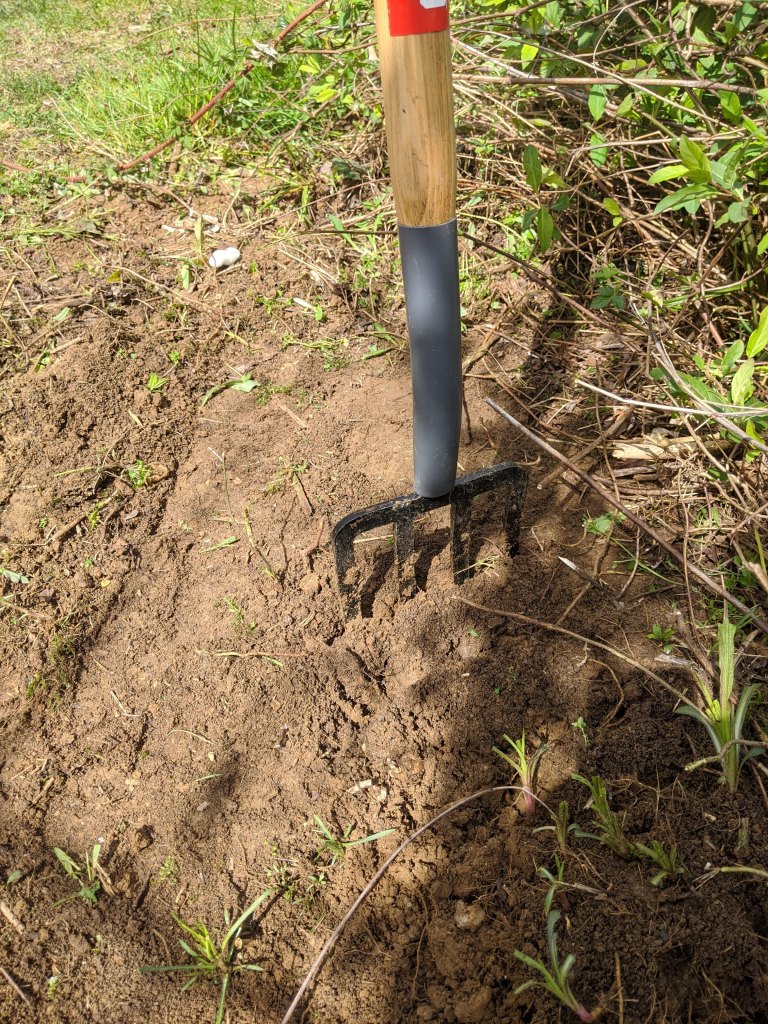
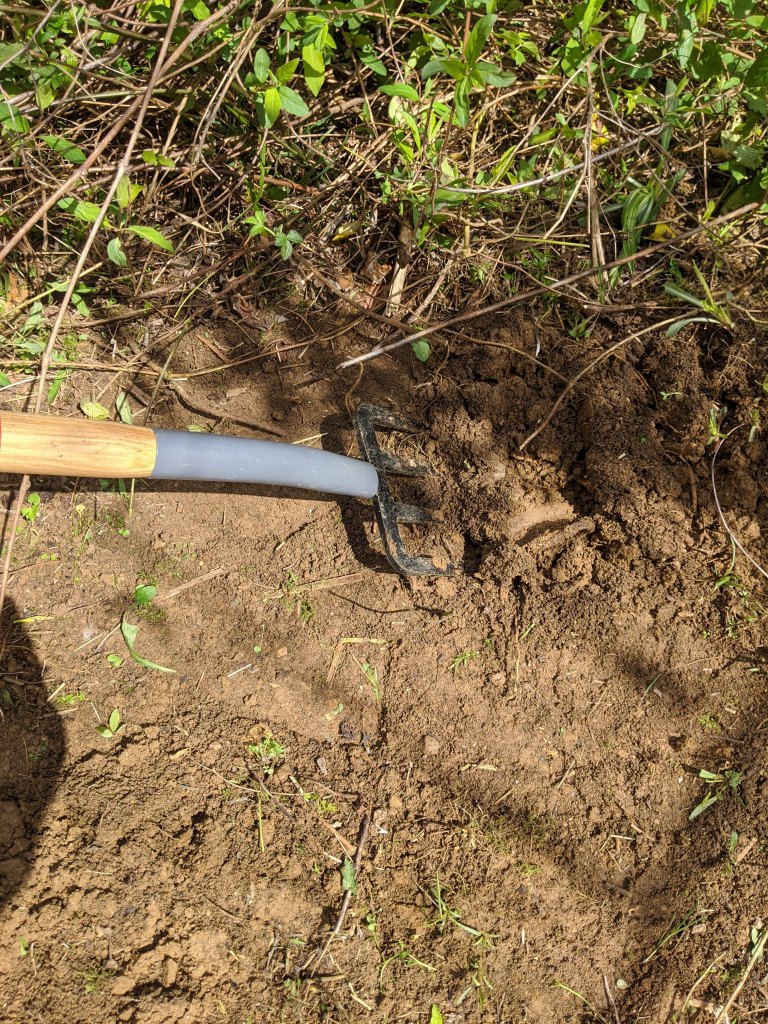
Loosening Soil with a Ground Fork
After the vegetation is clear, you’ll need to loosen the soil. Disrupted ground like you’ll find on the edge of developments is often compacted from the heavy earthmoving equipment used during construction, so breaking up the soil will make it much easier for your plants’ roots to thrive. The easiest way to do this is to use a groundfork or a pitchfork. Simply pick a spot, wiggle the fork into the ground until the tines are buried, and then press down on the handle to “lift and drop” the soil back into place. You’re not trying to turn the soil over, as this can disrupt the organisms that keep the soil healthy. Just break the soil open, then move back a few inches and repeat the process until the entire site has been loosened and the soil is relatively fluffy. If you have access to compost, this would be a great time to spread it over the garden so that it is worked into the soil as you loosen the ground.
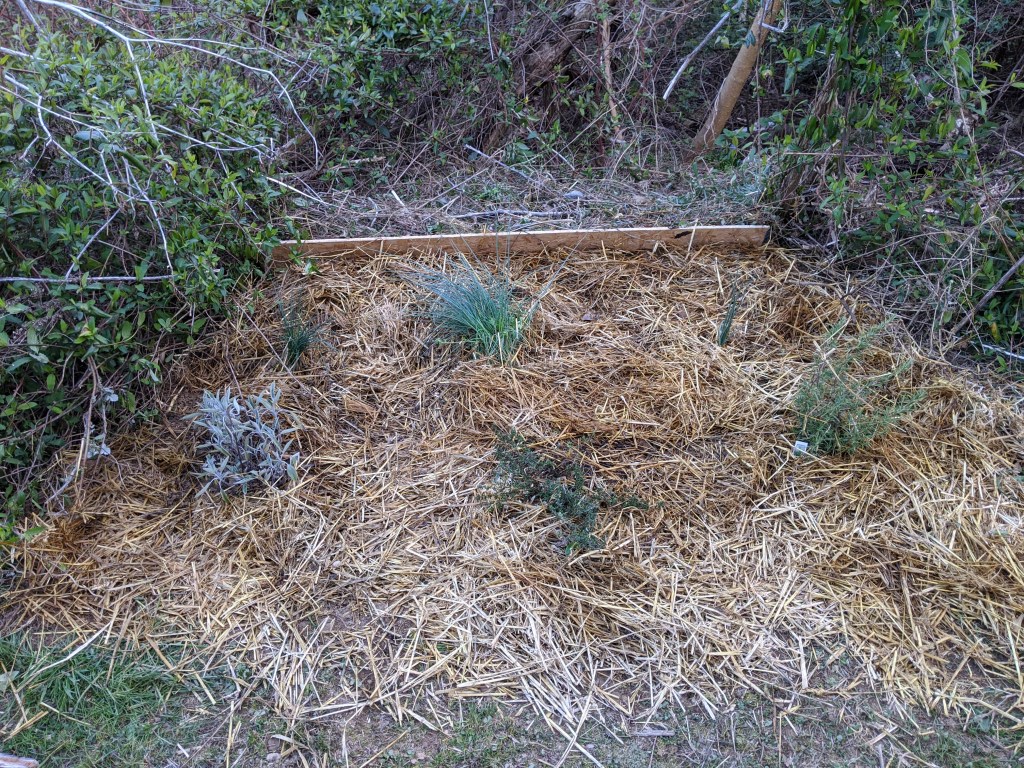
Planting Herbs
At this point you’re ready to put your plants in. I used some herbs that had survived the winter in my herb box, but you can use anything that grows well in the conditions in the bed. Do a bit of research to find what plants will thrive in the light levels that you have, and you’ll avoid a lot of struggle and disappointment. I used a spade to dig out an 18-inch wide hole and filled it with potting soil before plopping my plants in, just to give the transplants a head-start with nutrients.
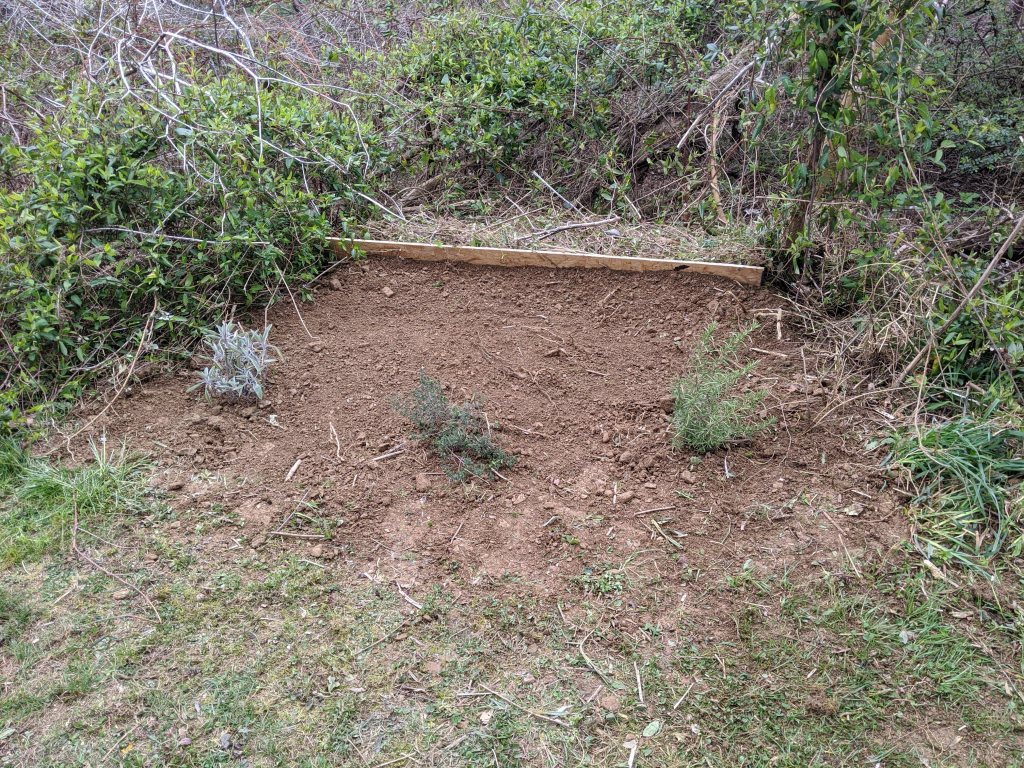
Spreading Mulch
At this point you’re almost done. Add some mulch around your new plants to hold in moisture and prevent erosion of your newly-fluffed soil (you can scatter the vegetation you cleared earlier as long as you don’t mind some weeds re-establishing), and you’re off to the races. Give everything a good watering, and step back to admire the difference you’ve made! Keep things moist, particularly when the weather gets hot, and your plants should take to their new home like a pig to mud!

2 thoughts on “Creating a Suburban Permaculture Garden”